Using Nekoray
Introduction
Nekoray — is a modern, multi-purpose client for working with VPN and proxy servers, providing a high level of security and privacy. The application is easy to use and does not require complex configuration, which makes it an ideal choice for both experienced users and beginners.
-
User-friendly interface: the intuitive design simplifies managing settings and connections.
-
High performance: optimized for fast and stable connections without loss of speed.
-
Cross-platform: available for various operating systems, including Windows and Linux.
-
Flexible configuration: support for custom configurations and cores allows you to adapt the application to your needs.
-
Security: uses modern encryption protocols.
-
SOCKS (4/4a/5)
-
HTTP(S)
-
Shadowsocks
-
VMess
-
VLESS
-
Trojan
Thanks to its support for a wide range of protocols, Nekoray provides maximum compatibility with different servers and services, allowing you to bypass regional restrictions and protect personal data when working online.
First, you need to deploy the VPN on your own server. To do this, you can use the 3X-UI panel. Our servers are ideal for hosting a VPN. Any entry-level plan with at least 1 vCPU / 1 GB RAM / 10 GB SSD / 100 Mbps and the Ubuntu 20.04 operating system will be sufficient.
Installation
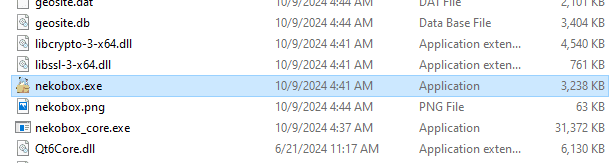
Download Nekoray from the official repository. We will use Windows as an example. Download and extract the archive. You will see multiple files inside; use nekobox.exe to start the application. Nekoray does not require installation and is ready to work immediately after unpacking the archive.
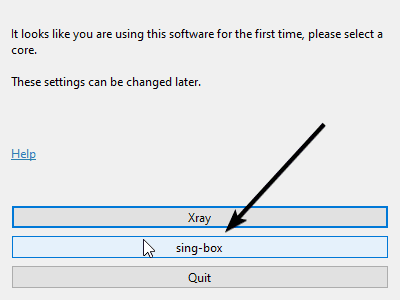
On first launch, select "sing-box".
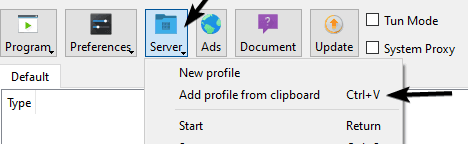
Copy the VPN configuration you created according to the instructions above. It should look like "vless://...". After launching the application, click the "Server" button -> "Add profile from clipboard" or press Ctrl + V.
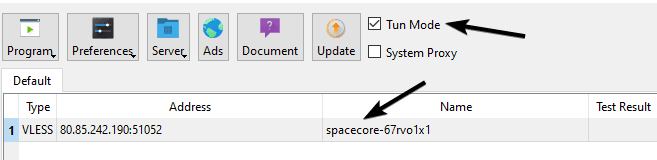
After adding the configuration, enable "Tun Mode". The application may ask to restart with administrator privileges; allow it.
Then right-click the configuration and click "Start".
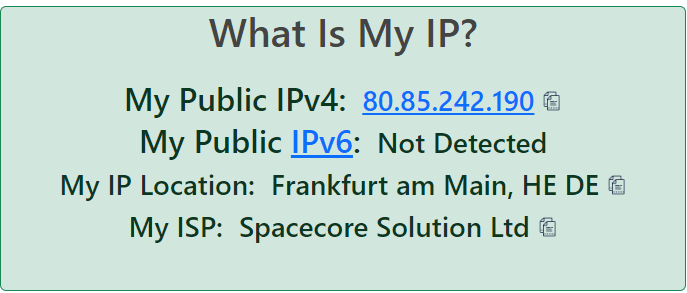
If a large amount of information appears in the log and traffic usage increases, it means the connection has been established successfully.
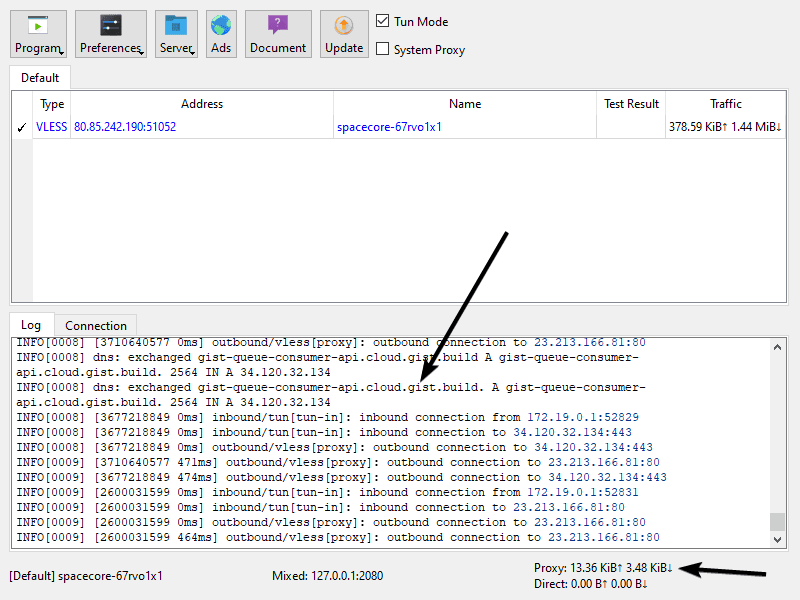
Great! Everything is working. Additionally, in the "Program" menu you can enable "Start with system", which will allow the application to start automatically when your computer boots.