How to order a dedicated server?
The process of ordering a dedicated server is generally similar to ordering other services, but dedicated servers have several specific parameters, such as CPU type, RAM capacity, disk configuration, RAID, network port, and number of IP addresses. Below we will go through the full path from choosing a server to paying for it and activating the service.
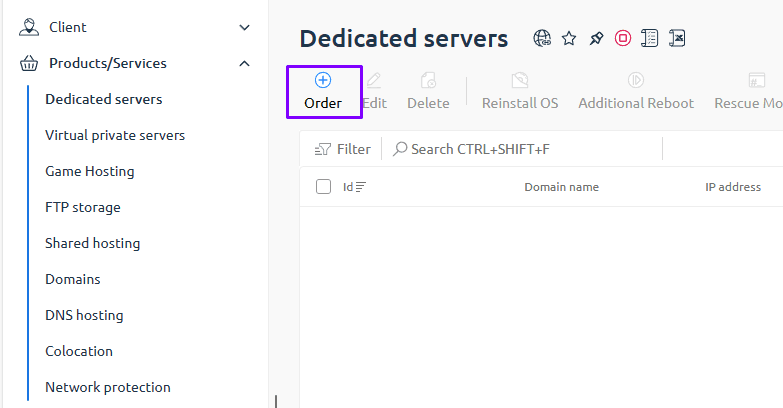
Step 1. Go to the “Dedicated servers” section
Log in to your client area and go to “Products and Services → Dedicated servers”. The page will display a list of available configurations as well as filters by location and other parameters.
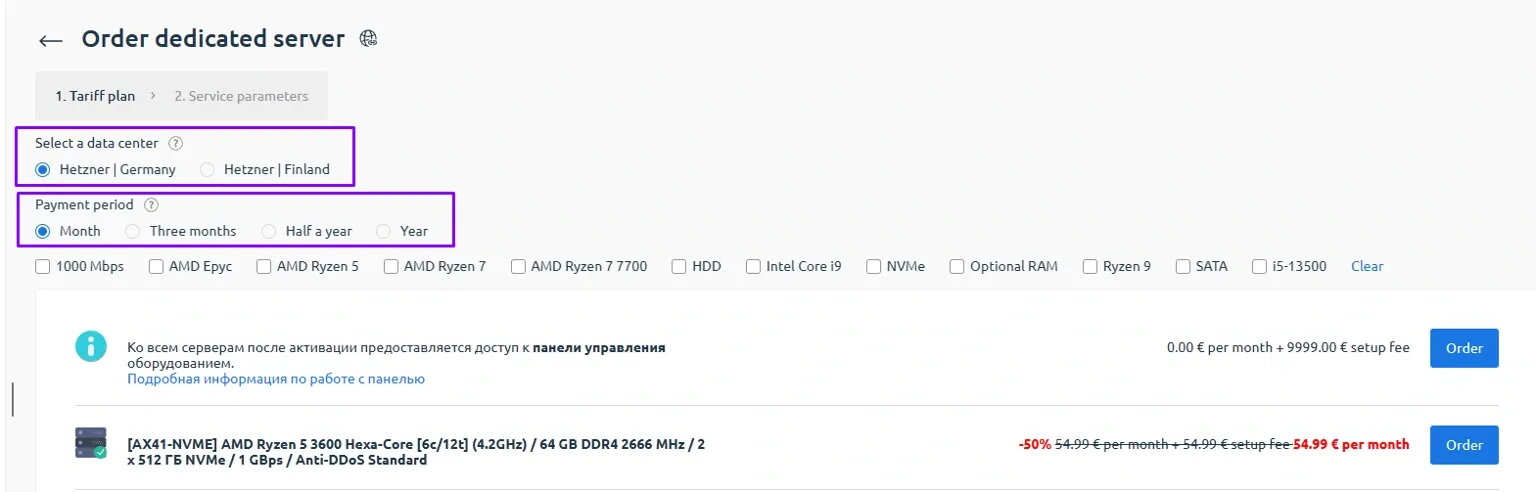
Step 2. Choose a location and rental period
On the dedicated server selection page, specify:
- Location — the data center where the server will be hosted
- Rental period — the period for which you plan to order the service, for example 1 month or 3 months
After selecting these parameters, the system will show the available configurations. Find a suitable server and click the “Order” button.
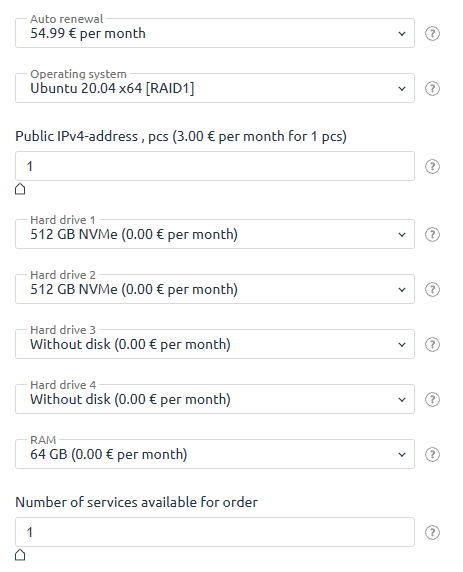
Step 3. Configure server parameters
On the next step you will see a card with the full set of parameters for your future server. Here you can review or adjust the following:
- Auto-renewal
When auto-renewal is enabled, the service will be renewed automatically using the funds on your account balance. No money is charged directly from a bank card, so one day before the service expires, make sure there are enough funds on your account. If the payment is overdue, you can renew the service manually on the “Dedicated servers” page using the “Renew” button. - HostName
The server domain name in the format . If you leave this field empty, the system will assign a technical subdomain such as . - Operating system
Select the OS that will be installed when the service is activated. Later you will be able to reinstall it to any other available system via the control panel. - CPU and RAM
Make sure the selected CPU, number of cores and threads, and the amount of RAM match your workload. For resource intensive projects, it is recommended to choose configurations with some overhead in both cores and memory. - Storage and RAID
Select the disk type, such as HDD, SSD, or NVMe, their quantity, and the RAID configuration if available. RAID improves fault tolerance and or performance but reduces the effective usable disk space. - Network parameters
If needed, specify the port speed, for example 1 Gbit/s, traffic limits if any, and the number of dedicated IPv4 addresses. - Pre-installed software
A set of software and control panels that will be automatically installed on the server right after activation. This parameter is optional, and you can install all required software manually. - Number of servers
If you need to order several identical dedicated servers at once, specify the required quantity in the corresponding field.
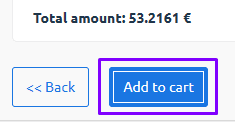
Step 4. Add to cart
After checking all parameters, click the “Add to cart” button. If you specified a quantity greater than one, the cart will contain several identical servers.
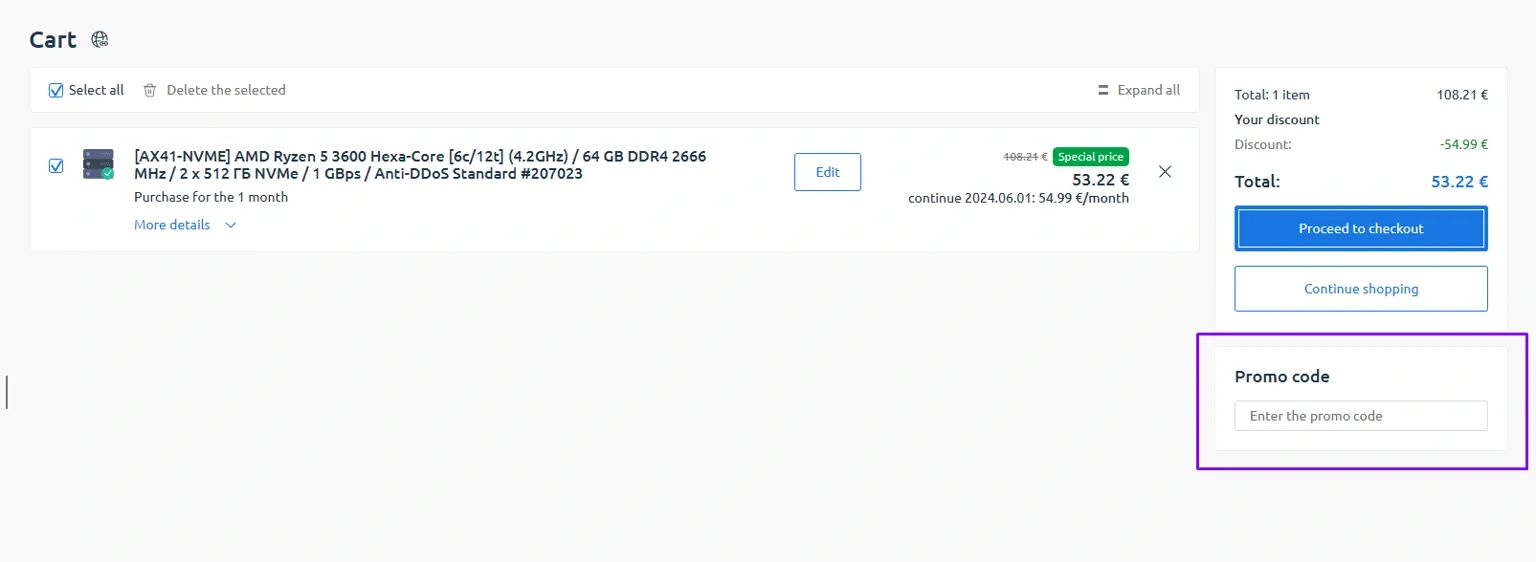
Step 5. Checkout and promo code
Go to your cart. Here you can:
- review the configuration of the selected dedicated server once again
- change the rental period if this is allowed at this stage
- remove unnecessary items from the cart
- enter a promo code if you have one
After entering the promo code, click the button to validate or apply it. If it is successfully applied, the discount will be reflected in the order total. Then click “Checkout” to proceed.
Step 6. Choose a payment method
On the payment page, choose a convenient method:
- Account balance — if there are already enough funds on your balance
- bank card and other available payment methods
Note that payment from the account balance is available only if it has enough funds to cover the full cost of the order.

Step 7. Payment and activation
Complete the payment in the selected payment system. After a successful payment, the order will appear in the list of services with the status “Activating”. Activation takes some time — during this period the server is being prepared and the selected OS is being installed.
Once activation is complete, the access details for the server, including IP address, username, and password, will be available in your client area in the service card. As a rule, this information is also duplicated to the email address specified during registration.
What is RAID on dedicated servers
RAID is a technology that combines multiple hard drives into a single logical array. It is used to increase data storage reliability and or improve read and write performance.
The most commonly used RAID levels on our servers are:
- RAID 0 increases read and write speed by striping data across all drives. However, it provides no redundancy, so if a single drive fails, all data is lost.
- RAID 1 uses data mirroring. All information is duplicated across two or more drives. This improves reliability but cuts the available storage capacity in half. For example, if you use two 2 TB drives in a RAID 1 array, you will have 2 TB of usable space.
Simply put, RAID 0 is used when you need to maximize disk space and performance, and RAID 1 is used to improve data protection.