Connecting to a Server with SSH Keys on Windows (PuTTY)
Are you concerned about the security of your server? You need to enable SSH key based authentication, and now we will look at it in more detail.
Installation on Windows
Launch the PuTTYgen application, or download the portable version that matches your system architecture using one of the links below:
32 bit version: download
64 bit version: download
When launched, the following window appears:
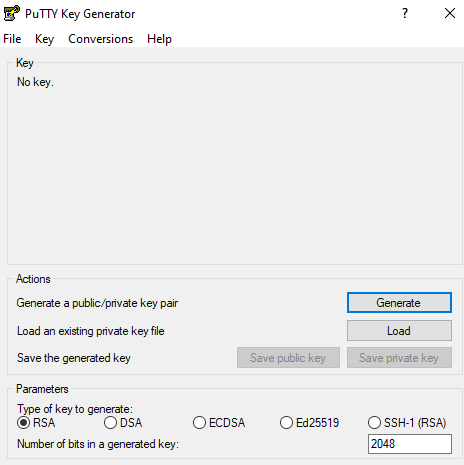
Click the Generate button and move the mouse cursor randomly for some time. This is required to generate a unique key.
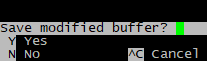
After completing these steps, we see the following:
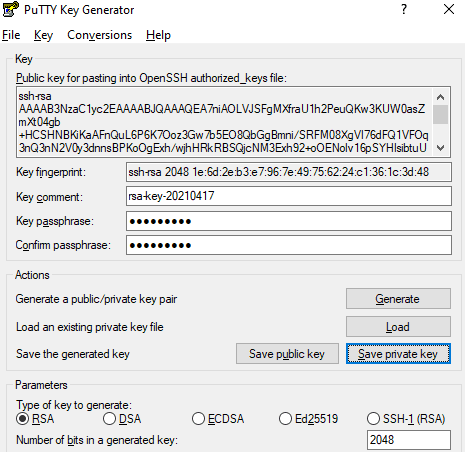
The Public key for pasting field contains the prepared text that we will need to use later.
If you wish, in the Key passphrase field you can specify an additional code for your key that you will need to enter every time you connect to the server. In our example, we use the word spacecore. Then click the Save public key button to additionally save the public key shown above, and also click Save private key to save the private key file, which will be required for future connections to the server.
The key file names can be anything. This does not affect how they work.
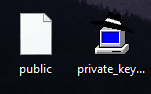
We have now saved and obtained two files.
Two ways to add an SSH key to the server
Using the nano utility
After connecting to the server, run the following command:
We have opened the editor for the authorized_keys file, which is responsible for configuring SSH keys.
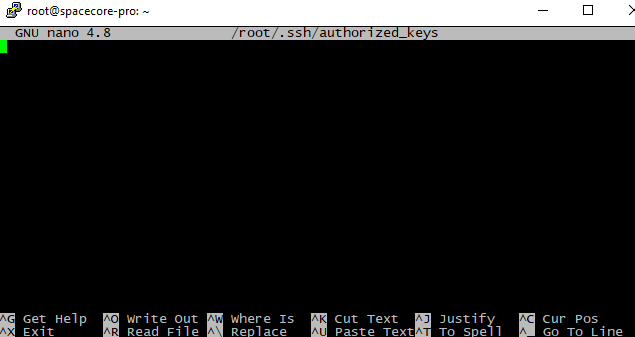
The file is currently empty. We need to copy all the text from the PuTTYgen window:

Then paste it into the file that is being edited using RMB (right mouse button).
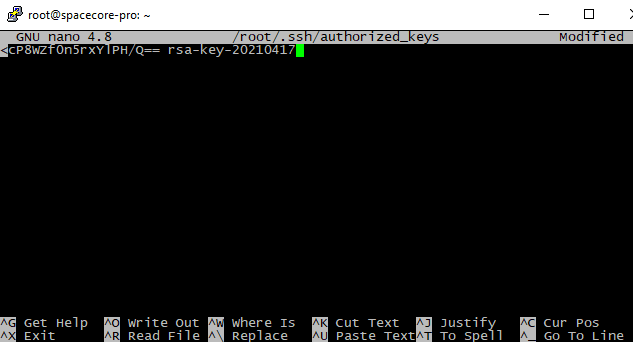
Press the Ctrl + X key combination.
Confirm saving the file by entering the letter Y.
The SSH key has been successfully linked to our server.
Transferring data via sFTP
Connect to our server. On the main page you will see the list of files. Go to the .ssh directory.
Here we see the authorized_keys file. It is currently empty and its size is 0 bytes.
Right click and open this file.
Paste the same public key from PuTTYgen here.
Save the changes and upload the file to the server.
That is it, the SSH key is now installed.
Connecting via an SSH key
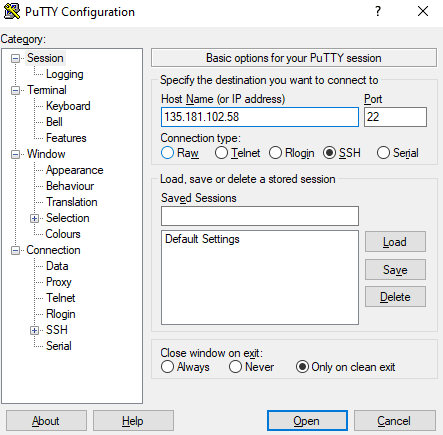
When you open PuTTY, you see the standard interface. Here you need to enter the server IP address.
In the left menu, expand the SSH section and go to Auth.
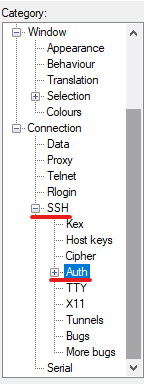
Here you need to select the location of the private key file (note, not the public one) with the .ppk extension.
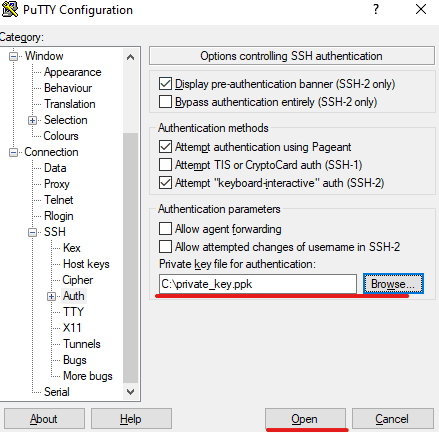
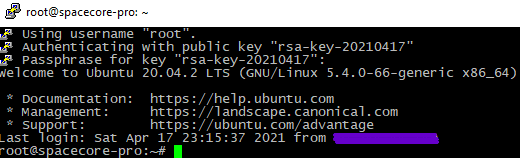
After adding the key, click Open. The standard login prompt appears, fill it in.
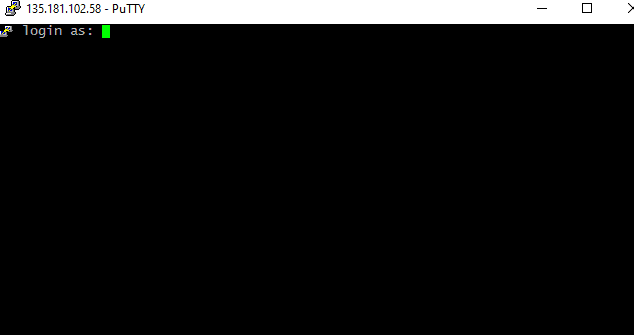
After entering the username, you will be prompted for the passphrase (when generating the key we specified spacecore). Enter it.

Congratulations, authentication via SSH key was successful.
How to save server details for quick login
You need to enter the server IP address and attach your private SSH key. Then specify a name for the session you want to save.
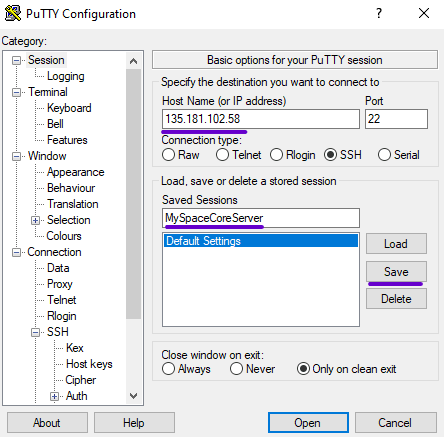
The session has been saved.
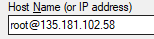
You can also specify a username before the IP address to speed up the login process, like this:
username@IP address

Save it. Now, when you double click the saved session, a window opens where you need to enter the private key passphrase (only if you set one. If there is no passphrase, the connection is established instantly without entering any additional data).
Enter it. You are now connected.